Installation | on May 17th, 2019
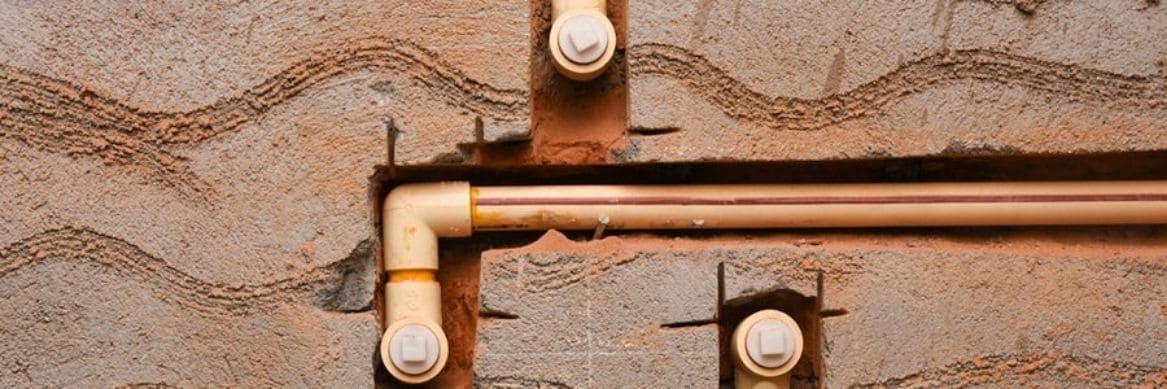
Chlorinated polyvinyl chloride (CPVC) pipe and fitting installation is quick and cost-effective. Pipes are joined with solvent cement welding process also known as cold welding process with inexpensive and readily available tools. Additionally, installation of CPVC pipe fittings is much safer, faster & plumber friendly than Pipe PPR & other plastics & metallic pipes because it does not require heat fusion or other complex techniques for installation.
Following best practices for FlowGuard® pipe and fittings installation will ensure a reliable, long-lasting plumbing system.
The tips highlighted below do not replace the manufacturer’s instructions but provide a list of helpful dos and don’ts.
Storage and Handling
Although FlowGuard CPVC is durable, practice proper care while storage for successful installation.
- Tip #1: Store pipe on flat areas, free of sharp jagged rocks or debris that could puncture or damage the pipe. Additionally, never set anything heavy, sharp or rough on top of the piping.
- Tip #2: Keep piping covered when exposed to UV light, such as when storing it outside. Although some exposure to UV won’t damage piping, we still recommend covering piping with a non-transparent material.
- Tip #3: Avoid storing CPVC pipe in high-traffic areas. Never store piping in areas where heavy power equipment is moved around. Although CPVC is a strong material, running over the pipes with heavy machinery can cause damage.
Preparing For Installation
While CPVC pipes installation is fairly simple, a few safeguards will ensure a reliable system.
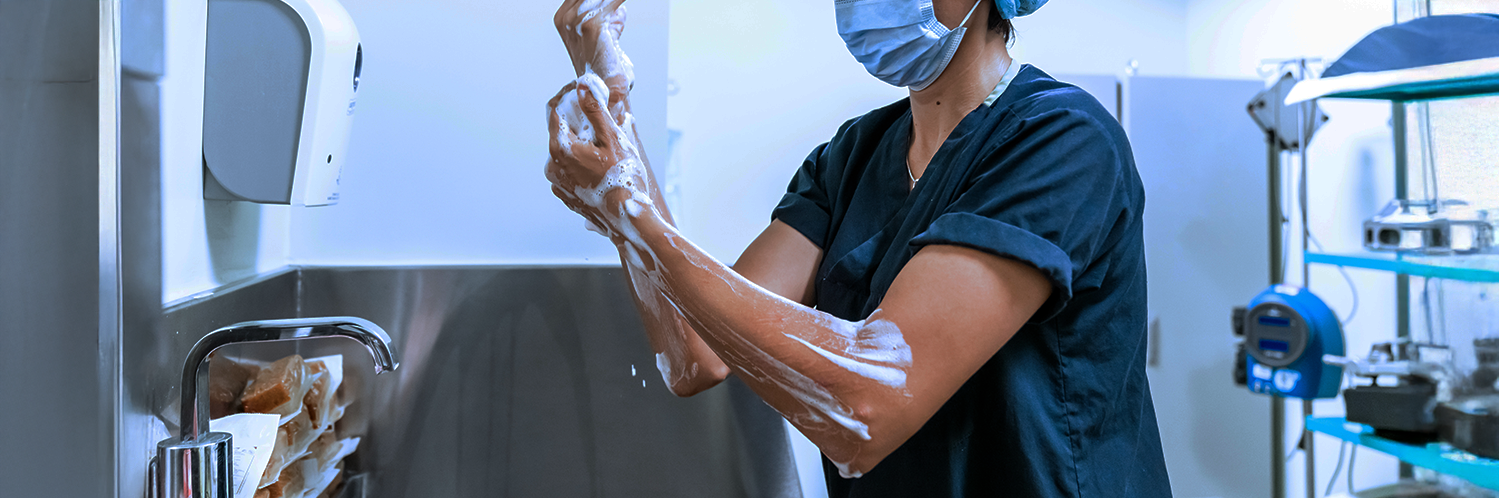
- Tip #4: Wear protective clothing, safety goggles, and gloves. While solvent cement welding is much safer than other installation methods, it’s still a chemical process, so skin and eyes should be covered.
When using or handling solvent cements, primers and cleaners, proper ventilation, and good work habits will minimize following risks:
- Keep away from sparks and open flame
- Keep containers closed except when in use
- Dispose of rags and containers properly
- Avoid eye and skin contact.
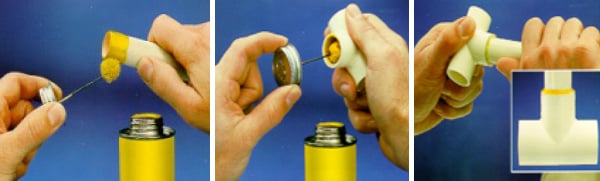
- Tip #5: Wipe away any dirt or moisture from the pipe and fittings using a cleaner to ensure a strong solvent cemented bond.
- Tip #6: Inspect the pipe before and after cutting. There should be no visible cracks or damage. If damage is present, measure 5 centimeters from the end of the crack and recut the pipe.
- Fitting preparation - Wipe any dirt or moisture from pipe and fitting Dry fit pipe and fitting, contact should be made about 1/2 way into fitting. (Points to Remember - Tapered socket - pipe and fitting will gradually snug up. Too loose or too tight are cause for concern)
- Tip #7: Use an appropriate tool to ensure a square cut and maximize the bonding surface. Use a sharp circular saw, miter saw, hand saw or ratchet cutter and make sure the blade is fine toothed (6 to 7 teeth per centimeter).
- Tip #8: Bevel the pipe prior to solvent welding. Using sandpaper, create a slight bevel along the pipe edge. This will prevent the solvent cement from being pushed down into the fitting.

During Installation
When installed properly, newly-formed joints become the strongest part of the system. To achieve this result, abide by a few standby rules.
- Choosing Solvent Cements & Primers – Solvent Cement for FlowGuard CPVC systems must conform to the requirements of ASTM F-493 or equivalent and should carry the identification on the can Label.
- CPVC Cement Shelf Life – CPVC solvent cement are formulated to have a shelf life of 2 years. Aged cement will often change colour or begin to thicken and become gelatinous or jelly like.
- Primer /Cleaner application – Primer is applied while installing higher dia. Pipes & Fittings (above 2”) One-step solvent cement does not require a primer. Always make sure pipe and fittings are clean and dry. Two-step process primer/cleaner prepares the bonding surfaces. Applicator should not be any larger than 1/2 the pipe or fitting diameter. Apply primer to both pipe and fitting. Do not allow primer or cement to puddle in the fitting or assembly
- Tip #9: Try to join seams in cooler areas or shade. Heat can increase how quickly solvent cement evaporates. Pipes and fittings should only be joined while the solvent cement is wet, so stay in a cool area to make sure the solvent cement doesn’t begin to dry before you’re ready to join the pipe and fitting. Apply a thin solvent cement even film inside fittings Apply a heavier even coat to pipe ends.
- Tip #10: Allow the joint to set before moving forward. Immediately insert pipe into fitting, rotating pipe 1/4 to 1/2 turn while inserting Once assembly is seated and aligned hold joint in place for 5-10 seconds. Check for even cement bead around join.
- Tip #11: Never re-apply over dried solvent cement. If solvent cement dries before you’ve bonded the pipe and fitting, recut the pipe, clean the old layer of solvent cement with sand paper, or use a different pipe and fitting.
- Tip #12: Use the correct cure time. FlowGuard CPVC cure times vary based on temperature, humidity, and pipe size. Refer to the solvent cement manufacturer’s manual for specific times. The FlowGuard Pipe and Fittings Installation Guide also provides general time suggestions, but shouldn’t replace manufacturer instructions.
- Tip #13: Always look for an even bead of cement around the newly-formed joint. If the bead is not visible, then solvent cement might not have been properly applied. If this is the case, remake the joint to ensure system integrity.
- Thread sealants - Teflon tape is recommended. Always confirm sealant is compatible with CPVC, check label or contact manufacturer.
Want to Learn More Tips For Installing FlowGuard® CPVC?
Check out the full FlowGuard Pipe and Fittings Installation Guide for additional installation instructions, including proper storage and handling, cure time recommendations and using hangers and supports.
If you have any questions about FlowGuard CPVC pipe installation, our team of piping system consultants is ready to talk.
Do’s
- Use applicator that is approximately 1/2 of the pipe diameter
- Check pipe ends for cleanliness
- Let air pressure out of system after testing
- Deburr and chamfer pipe ends after cutting
- Have clean / straight cuts
- Rotate pipe a 1/4 to 1/2 turn when making joints and hold in place for 5-10 seconds
- Remove rocks or sharp objects from trench
- Use thread sealants and firestop materials that are compatible with CPVC
Do not’s
- Use dull or damaged cutters
- Allow solvent cement or primer to puddle in system
- Use solvent cement that has gelled / thickened
- Allow CPVC to come within 15 cm (6") of radiant heat sources
- Use prelubricated insulation or petroleum-based products
- Use pipe straps or hangers with rough or sharp edges